Revamp Your Headbands: DIY Accessories for Every Season
Advanced Techniques
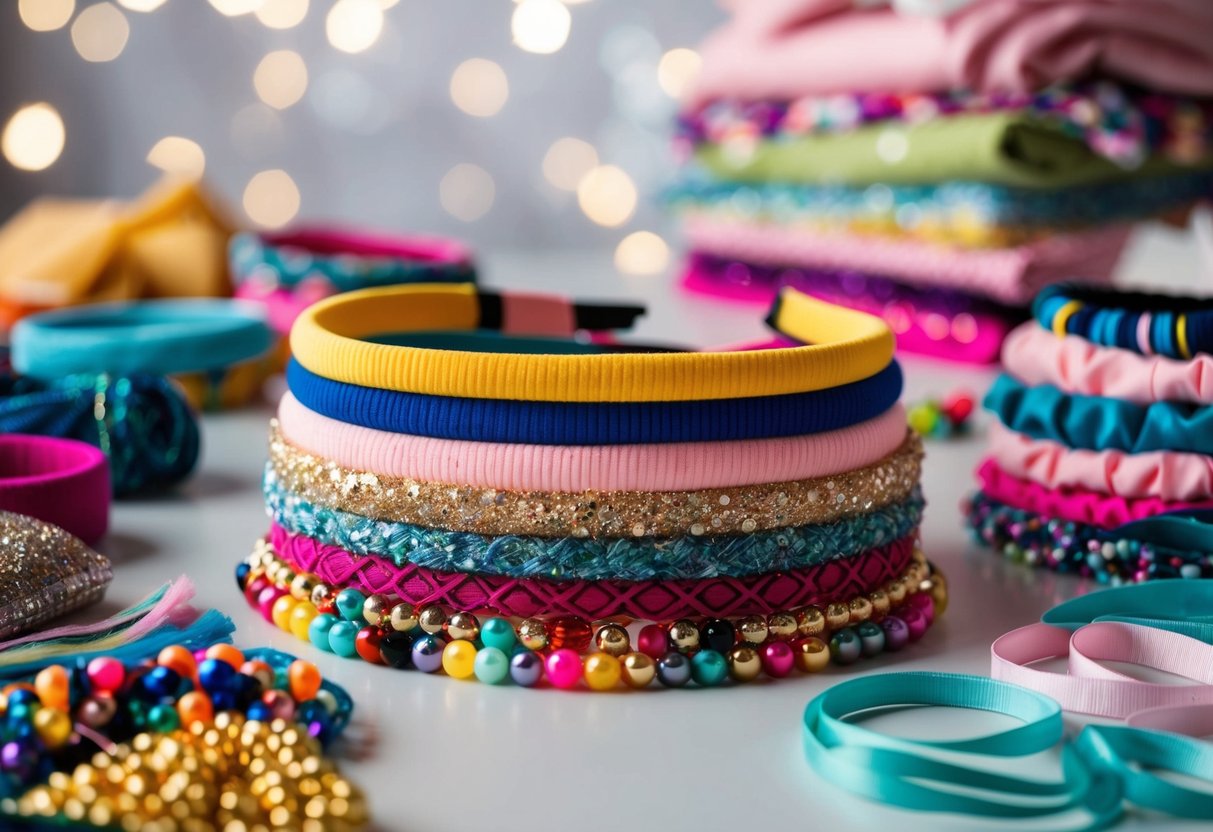
Taking headband-making to the next level involves mastering intricate details and mastering techniques for using stretch fabrics. With the right tools and materials, these advanced approaches open up opportunities for creating unique and personalized accessories.
Adding Intricate Details
Incorporating intricate details into headbands can transform a simple accessory into a statement piece. Using a sewing machine or serger allows for precise stitches and more complex designs. Techniques like embroidery or adding beading can provide rich textures.
For embroidery, fabric scraps serve as excellent material due to their flexibility and variety. Fabric paints or iron-on appliqués also offer ways to include detailed patterns. Positioning the embellishments strategically can enhance the overall design, making each headband a unique work of art.
Working with Stretch Fabrics
Stretch fabrics offer comfort and versatility but can be challenging to handle. A serger proves invaluable in ensuring that the seams are stretchy and durable. When cutting stretch fabric, it is crucial to follow the grain and maintain consistent tension to prevent distortion.
Pinning and basting every seam before using a sewing machine can help in managing the fabric’s elasticity. Choosing the right needle, typically a ballpoint needle, reduces the risk of skipped stitches. Attention to detail in these steps ensures that the final product is both comfortable to wear and visually appealing.
Creating a Headband Knot
Crafting a headband knot adds charm and versatility to any accessory collection. With just a few materials, this can be a simple and enjoyable project. Start with a strip of fabric, preferably cotton or jersey, that measures about 24-30 inches in length and 4 inches in width.
Fold the fabric strip in half lengthwise, with the pattern on the inside. Sew along the open edge, leaving a small gap to turn the fabric right side out. Turn it inside out through the gap and sew the opening closed, creating a clean finish.
Once you have the fabric ready, craft the knot. Make a loop by crossing the ends over each other, forming a simple overhand knot. Adjust the fabric and tighten the knot to your liking. A firm pull will secure the position, ensuring a neat appearance.
Position the knot at the top of your head, adjusting the ends so they rest comfortably behind your ears. The headband knot should feel snug but not too tight. It works well with various hairstyles, from loose curls to sleek ponytails, offering a stylish touch without overwhelming the look.
Experiment with different fabrics and colors to match the changing seasons. Lightweight materials suit warmer weather, while thicker fabrics add coziness in winter. This DIY project not only enhances personal style but also offers a practical way to refresh accessories throughout the year.
Seasonal Styles and Decorations
For DIY headbands, each season offers unique opportunities for personalization. Spring calls for light and floral designs, while summer invites vibrant colors. Autumn embraces warm shades and winter highlights cozy materials. These detailed styles can transform headbands into versatile accessories that align with seasonal themes.
Spring Florals and Pastels
Spring is synonymous with renewal, making it an optimal season for headbands decorated with florals and pastels. Floral patterns in light fabric provide a fresh look. Using pastel-colored ribbons or even small artificial flowers can create an enchanting style. This adds a touch of elegance and whimsy that’s suitable for garden parties and casual outings alike.
Fashion trends favor soft pinks, lilacs, and mint for spring. These colors blend well with knit fabric headbands, offering both comfort and style. Light and breathable materials ensure that the accessory remains practical for the warmer days. Combining these elements creates a harmonious balance between fashion and functionality, perfect for the gentle transition into warmer weather.